A Brief Introduction About Myself

- PurposelyMe
- I am Just a simple Guy.. hate complicated thing... Easy going.. love travel.. Like messing with code(programming)... me and money but not materialistic just enough have money to be fun with love to be middle class person... hate to be upper class <---- life not easy okay.. lot of temptation
Followers
Outside of My Mind
Blog Archive
Listed Web Blog
Brite Yourself
 I redirect traffic from my site
The easiest way to redirect feed traffic: use an automatic option
If you use Blogger, TypePad, or self-hosted WordPress to publish your blog or site, you're in luck! Each of these platforms offers an automated option to greatly simplify how to activate redirection. Visit the QuickStart Guides section of this Help Center and follow the instructions for your platform to get started with FeedBurner and ultimately redirect 100% of your feed traffic to your FeedBurner feed.
However, if you are using a publishing system other than one of those listed above, you may not have an immediate, automated solution for redirecting feed traffic properly. The following discussion offers suggested approaches (and is meant for advanced publishers who are comfortable changing and controlling specific web server settings.)
Manual redirection tactic: the "conditional redirect"
- Note your "burned" FeedBurner feed address. You'll find this address by signing in to feedburner.google.com and clicking the
 icon next to your feed's listing on the main My Feeds page. Your browser will display the feed and you can then copy this address from the browser's location or address field.
 - Work with your provider to set up a "conditional redirect" from your site's original feed to the burned feed address. With an Apache web server, this instruction would appear as follows for any feed address ending in "index.xml":
RewriteEngine on
  RewriteCond %{HTTP_USER_AGENT} !FeedBurner
RewriteRule ^index\.xml$ http://feedproxy.google.com/YOURFEEDADDRESS [R,L] - A conditional redirect tells your web server not to mistakenly redirect FeedBurner's own request for the feed. (FeedBurner needs to request your original feed for new content, of course.) Multiple rewrite rules may be needed if your publishing service offers several different feed formats. These instructions are placed in a file named .htaccess.
- If you want to create a special graphical link to your new AdSense-enabled feed on your website, you can use FeedBurner to generate the necessary HTML code that you can insert onto the relevant web page. Sign in to feedburner.google.com, click the feed title for which you want to create a chicklet, and then visit Publicize > Chicklet Chooser.
This tip only works if you have control over the HTTP directives for your web server (for example, you can author and edit .htaccess file(s) if you use an Apache web server).
If you cannot set up a conditional redirect, the more basic redirection approach below is a good alternative.
Alternative traffic redirection tactic: the "hidden" feed
Here is a basic illustration of feed traffic. You start out with feed readers requesting your feed as usual:

The next step is to generate your feed to a different file name (shown as fb-index.xml in this example) and you point FeedBurner at that new file. Then, you use your web server to redirect any access for the original file (index.xml) to the feeds.feedburner.com URL.

You have now maintained control of your feed. If you decide that you don't want to use FeedBurner's services any more, you can either change the redirect to your private feed (index.xml goes to fb-index.xml) or you can just go back to generating your feed to the original file (index.xml) and get rid of the redirects.
One gotcha: please remember to point FeedBurner at the new, private feed URL! If you instead point FeedBurner at the original URL, everything will go around in a big circle as FeedBurner attempt to read your source feed, which points to the Feedburner feed, which points to the source feed, and on and on.

Now, we actually trap this condition so it does not cause trouble for your web server or FeedBurner itself: FeedBurner just serves up the most recent content we were able to retrieve. But if you do this redirect trick and it looks like your feed isn't being updated, check to make sure you haven't fallen prey to this infinite redirect gotcha.
 Dangerous Bangkok R5 (2008)
Dangerous Bangkok R5 (2008)

A professional hit man, who picks someone of the street to do his errands, and after he is finished kills that person. His next assignment takes him to Bangkok, and as usual, he finds a street kid named Kong to help him. After Kong has a close call and learns who he is, asks him to train him and he does. He also meets a local girl who is deaf and spends time with her. However, has a hard keeping.
Download links:
Part1
Part2
Part3
Part4
 DirectX 10 NCT
DirectX 10 NCT

DirectX 10 NCT 2 is a new patch allowing to increase compatibility of new games and programs with Windows XP and to achieve appreciable increase in speed and quality of a drawing in games. As the patch corrects errors with start of games demanding files DirectX 9.0с and earlier versions. As in the presence of a video card with support DX10 allows to make accessible those options, in games of new generation which before installation of these libraries were inaccessible. In this version the quantity of libraries is increased twice that at last has allowed to reach high-grade DirectX 10 for Windows XP.
Download link
 Nero Lite v9.0.9.4
Nero Lite v9.0.9.4

Nero 9 is the next generation of the world’s most trusted integrated digital media and home entertainment software suite. It features new cutting-edge functionality that makes enjoying digital media content simple.
This easy-to-use yet powerful multimedia suite, gives you the freedom to create, rip, copy, burn, edit, share, and upload online. Whatever you want – music, video, photo, and data – enjoy and share with family and friends anytime, anywhere.
With easy-to-use Nero StartSmart command center, your digital life has never been more flexible, feasible, and fun.
Nero 9 Highlights:
Fast and easy rip, burn, Autobackup, and copy functions
Backup files to CDs, DVDs, and Blu-ray Discs*
Create professional-looking DVD movies with integrated 3D menus
Copy, burn, share, upload, and create music mixes like a DJ
Convert music, photos, and DVDs to play on your iPod® and other mobile devices
Quick photo and video upload to My Nero, YouTube™, and MySpace
Watch, record, pause, and customize your live TV experience
Play AVCHD and other HD formats
Creative Projects Are Easier than Ever
Using the intuitive Nero StartSmart command center of Nero 9, your digital life has never been more flexible, feasible, and fun. You directly access features and perform one-click functions such as Audio Ripping, Burning, Copying, and AutoBackup, with optimized performance for Windows Vista® with Nero DiscCopy Gadget.
Fully Enjoy Your Content at Home, Online and On-the-go
Whether it’s video, photo, or music, you can convert and share everything your imagination creates in your digital world. Convert & share multimedia files to play on iPod®, PSP®, and upload online your coolest photos and videos to share with online communities like My Nero, YouTube™, and MySpace.
Make Your PC a Dynamic Home-Entertainment Device
Experience TV from the comfort of your sofa with state-of-the-art TV technology, even for HDTV and DVB Radio. Pause, record, schedule, manage, and playback your TV shows.
Best in the Business Software Gets Better
The ripping and burning capabilities of Nero 9 are the most reliable in the industry. Burn and copy to CD, DVD, Blu-ray Disc – even copy movies*. With DVD-R Dual Layer and DVD+R Double Layer support, you’ll get more data on a disc than ever before!*
Trusted and Reliable – Backup, Restore, and Secure
Don’t lose your valuable memories and important files to life’s potential hazards, system crash, or risky hardware. Backing up, securing, and managing files and data is a point-and-click away.
Download link
 360 Desktop v0.5.4.1479
360 Desktop v0.5.4.1479

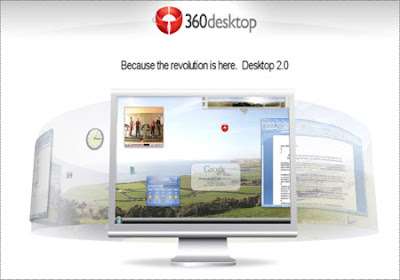
With 360desktop, slide wide for almost unlimited desktop space; clip the web & put it on your desktop, then create & share, stunning 360° interactive wallpaper.
Features
-Get more desktop space for everything you like to do
-Take your favorite content from across the web and put it on your desktop
-Choose from an endless selection of 360° wallpaper you download, create & share.
360desktop is
* a software that extends the Windows desktop as a 360° workspace
* an online platform for creating interactive 360° wallpaper
* a gallery & widget platform, for sharing 360’s with everyone
Download link
 Laconic Fantastic Flame Screensaver v7.0.1.800
Laconic Fantastic Flame Screensaver v7.0.1.800

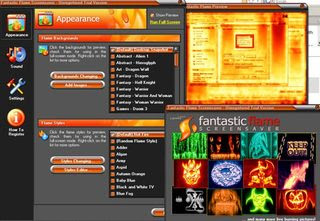
This award-winning screensaver generates a realistic fire effect. The flame is sensitive to the background, so each item on your desktop - including icons and all open windows - will appear to catch on fire, glowing and emitting a smoke effect.
1. True mathematical algorithm of the screensaver generates a very realistic real-time fire effects.
2. Unlimited number of color combinations of the fire. Really FANTASTIC flame! Additional fire parameters such as wind gust speed and direction and burning intensity.
3. Flexible presets system. A lot of ready fire styles comes included.
4. The screensaver includes a comfortable fire effects editor with a real-time flame preview.
5. 'Random' fire style. You never get tired of watching!
6. Lots of awesome fire backgrounds!
7. Changing the flame styles and background images periodically in the full-screen mode. A pretty fine effect - burning images to another ones!
8. Nice fire sound. There are 9 different fire sounds to choose from. Be aware! Your guests can think you have a big camp fire in your house! (Of course, you're able to mute the sound!).
9. Ability to choose any music for playing while the screensaver is running full-screen. Listen your favorite music with the sound of fire in the background! Just watch and relax! Some music titles come included.
10. You can take snapshots of your burning desktop anytime. Get fire screenshots with one key press!
11. Controlling the screensaver in the full-screen mode. Turning fire sound and music on/off, loading next flame styles and backgrounds, and even changing the fire intensity and wind direction available!
12. Full dual monitor support. Danger! Fire around!
13. A special feature which allows to launch Fantastic Flame Screensaver anytime you want by pressing a hotkey. Let's scare your friend!
Download link
 Adsense, Adbrite and Benefit
Today, I noticed adBrite has a nifty feature to help bloggers boost our profits: They let publishers specify a) an alternate ad program (for example, Google adSense and b) a minimum eCPM you will accept from adBrite ad campaigns. If the adBrite ads returns more than Google AdSense, we can display AdBrite; otherwise, you can display the Google adSense ads.
The more profitable ad program is seleted automatically, so as our blog reputations improve with advertisers, we can sit back and earn passive income on both new and old blog posts. Now that’s a great option bloggers!
Of course, in my case, I want to run these ads conveniently and retroactively without editing my 100 or posts I’ve already published.
Lucky for me I’ve installed the “adSense Deluxe” plugin which lets me manage these ads very easily.
Today, I’ll show you how to:
- Set your AdBrite requirements including your minimum price.
- Insert the AdBrite ads into AdSense Deluxe.
- Insert the AdSense Code into your blog posts.
- Describe how to edit the code so you can automatically modify every ad in every blog post in one fell swoop
How Use Adbrite inside Adsense Deluxe.
Step 0: Visit Adbrite. ( To join, use the handy image link to the left; yes, they have an affiliate program!). Once you are at AdBrite, click “For publishers” then click “Manage Ad Zones”. You’ll get to a url that says this http://www.adbrite.com/zones/ .
Step 1: Select Ad Formats. Click “Set up a new ad zone”. Click “Banner and/or Text ads” unclick the others.
Scroll down, find a red box that says “Next: Set Ad specs”. Click that.
Step 2: Select the banner ad size. I picked “Medium rectangle” to display inside by blog contents. (It’s 300 x 250; I wish they had 200 x 200, but they don’t. ) Try to chose colors if you can… I failed. The title color insists on being “0000FF” which is blue. (I’ll edit those later but it turns out the AdBrite color choices are irrelevant during the first few days. AdBrite advises you not to expect any AdBrite ads for at least 2-3 business days.)
I requested Family Friendly only ads and Auto-Approve. Then I scrolled past the “Create House Ad” bit and clicked the red button to do the next step.
Step 3: Describe your site. Fill out all the boxes at AdBrite. You’ll need your blog name, url etc. Click the red box at the bottom and continue.
Step 4: Mystery page. This is the most important page. You have one option: Click “Yes”; you participate in a competing program.
The page will explode and provide 3 more options. In the image below left, I’ve outlined the yes/no box in blue, the eCPM box in green and the competing adnetwork code box in red. (I don’t show the final “name campaign” box.)
The new page requests a minimum price, javascript from your competing program and an ad campaign name.
Before you fill this page out, you should know which competing ad campaign you want to alternate with AdBrite. I will be running AdSense, but you can run AdSense, Exoclick or any campaign that uses javascript to insert ads.
How to pick your price
AdBrite lets you specify a minimum eCPM. What you pick should depend on how much you are earning with the competing program. If you are earning $1.00 eCPM with adSense, you’ll want adBrite to show ads only if they will pay you more than that. If the AdBrite advertisers pay you less than that, show the adSense!
So, you think, “Ok, then I’ll visit Google, check my eCPM and enter that number. Wrong!
The value you enter at adBrite is the eCPM before adBrite takes its 30% commission. If you enter $1.00, adBrite will show ads that earn you $0.70.
In contrast, the eCPM adSense dispays is after Google takes whatever it takes. So, when Google says you have an eCPM of $1.00, you earned $1.00.
So, to make sure you can get $1.00 with the AdBrite ads, divide your Google eCPM by 0.70. That is, enter $1.43 (which is equal to $1.00/ 0.70.) Enter $1.43 in the eCPM box outlined in blue in the image above left.
Paste your Adsense Code in the Adbrite Box
Next, you need to paste the javascript for AdSense in the big box near the bottom of the AdBrite page. (The one I outlined in red above). These are the ads that will run when AdBrite can’t meet your $1.43 eCPM requirement.
Obviously, since these two ads are going to run in the same spot, you want the formats of the Adsense and Adbrite to match as closely as possible: My adsense is a 200 x 200 box; my Adbrite is a 300 x 250 box. I wish AdBrite had a smaller box, but they don’t. This is the best I can do.
Find your Adsense code to paste in the AdBrite box
Ordinarily, you could visit AdSense to create a new code. But I already insert the AdSense using Adsene Deluxe which has stored the code I like to use!


To get the code I already use, I visit my Wordpress Admin panel, select “Options”, and find “Adsense Deluxe”; see above left. I click, find the various campaigns I’ve created and click the appropriate one based on memory. I click “edit”.
To find the Adsense code itself, I scroll down and find it. (See above right.)
At this point, I could edit that code. I could go to AdSense and get a new code with new features and save. This would change the ad format in every one of my blog posts where I inserted that particular ad. (That’s nearly all my blog posts.)
However, I don’t want to edit. Instead, I copy that AdSense code and return to AdBrite. I then paste that AdSense codeinto the AdBrite box outlined in red in the image shown way, way up and to the left.
Now, I’m done with Step 4 at AdBrite and I click to Step 5!
Step 5: Get the AdBrite code. In Step 5, Adbrite displays the AdBrite javascript code you need to use at your blog. You’ve finished all the steps required at AdBrite. In principle, you paste that long code wherever you want ads to appears. The ads will automatically alternate between AdBrite and AdSense; in my case, AdBrite will show when those ads earm me more than $1.43 eCPM. (AdBrite advises that I will need to wait at least 2-3 days before advertisers find my blog.)
Stick AdBrite Code in Adsense Deluxe!
To use this AdBrite code at my blog, I return to the Adsense Deluxe in my Wordpress, and click “Add New…”.
I paste the AdBrite javascript into the appropriate box, give the campaign a name and add a description. Save!
I called it “AdbriteBox”. From now on, I can insert ads by just entering the Adsense deluxe code in the exact spot where I want the ads to appear in my blog entries. (I generally like the beginning of the second paragraph. Sometimes I like to put it to the right of bulleted items. The “best” spot varies from post to post.)
I checked by adding the code on a test page: See the tiny bit of code?
Eventually, when I have tested AdBrite for a week, I’ll edit the “adSense Deluxe” ad campaign I have been using in all my blog posts. Then, the AdBrite/AdSense alternating code will appear automatically in all my blog posts. That will be more money for me!
Summary
Run, don’t walk to get your adBrite account. It will let you run AdSense for now, but slide in AdBrite whenever advertisers are willing to pay you more than you make with AdSense. If you use AdSense Deluxe to manage these ads, you can even make the additional money when people visit your old blog posts. That’s a pretty good thing because often, a few key stone blog posts bring in more traffic than your main index page.
Make more money on them and you’ll make loads of money! ![]()
 Ten Great Photo Sharing Site
Share your pictures through photo messages, online photo albums, custom prints and gifts.
* Snappages
Fully flash built interface with 3D slideshows and an image editor.
* Fotki
Free unlimited photo hosting for blogs, 9 cent prints, and photo contests.
* Shutterfly
Free unlimited storage, 12 cent prints, as well as calendars and photo books.
* PBase
One of the oldest and most trusted of these sites, PBase is not free, but has a really nice gallery and excellent community.
* Flickr
Arguably the most popular and widely used photo sharing site these days, a free and unlimited Pro option with geotagging and 15 cent prints.
* Smugmug
Unlimited photos, unlimited storage, but no free account if you want to share with others.
* Exposure Manager
Nice site with a focus on branding and sales. Unlimited storage and uploads, with an FTP option.
* PrintRoom
Geared toward serious shooters and pros, PrintRoom lets you create a web storefront for your photos.
* PhotoBucket
This one has been catching on, and offers 1GB storage on their free account, and 5GB on their pro with unmetered bandwidth.


